
Getting Started with Appwrite (Part 3/4): CRUD Functionality

This series will explore Appwrite, a self-hosted server backend, plus BaaS platform. We’ll dive in with a React invoicing app, showcasing authentication flow, database storage and serverless functions. Part 3 will comprise implementing CRUD functionality for invoices.
Welcome to the third part of the “Getting Started with Appwrite” series. In the previous part, we implemented functionality that allows users to register a new account and log in. In this part, we will focus on functionality that will let users create, update, delete and list invoices.
Invoice API CRUD Methods
We are going to start by implementing the following API methods for invoice CRUD requests:
- listInvoices - fetches all invoices from the invoices collection.
- getInvoice - fetches a specific invoice using its document ID.
- createInvoice - creates a new invoice with permissions that will allow the user to read, update and delete it.
- updateInvoice - updates an invoice by its document ID.
- deleteInvoice - deletes an invoice.
Here’s the code for the invoice.api.js file.
src/api/invoice.api.js
import { ID, Permission, Role } from "appwrite";
import { databases, databaseId } from "./appwrite.api";

const invoiceCollectionId = import.meta.env
  .VITE_APPWRITE_COLLECTION_ID_INVOICES;

export const listInvoices = () => {
  return databases.listDocuments(databaseId, invoiceCollectionId);
};

export const getInvoice = documentId => {
  return databases.getDocument(databaseId, invoiceCollectionId, documentId);
};

export const createInvoice = (userId, payload) => {
  const ownerRole = Role.user(userId);
  return databases.createDocument(
    databaseId,
    invoiceCollectionId,
    ID.unique(),
    payload,
    [
      Permission.read(ownerRole),
      Permission.update(ownerRole),
      Permission.delete(ownerRole),
    ]
  );
};

export const updateInvoice = (documentId, payload) => {
  return databases.updateDocument(
    databaseId,
    invoiceCollectionId,
    documentId,
    payload
  );
};

export const deleteInvoice = documentId => {
  return databases.deleteDocument(databaseId, invoiceCollectionId, documentId);
};
To perform operations on the invoices collection, we need to know its ID. We put it in the .env file in the first part of the series, but if you don’t have it, head to the Appwrite dashboard and then to the database’s or invoice collection’s page. Both pages display the collection ID.
You might have spotted that in the createInvoice method, we pass an array with read, update and delete permissions. As we previously covered in Part 1, Appwrite provides two levels of permissions—collection level and document level. The collection-level permissions are applied to every document in the collection, and we added a permission for all authenticated users to create invoices. However, we are also using the document-level permissions, as we need fine-grained control over who should be able to read, update and delete invoices.
In this scenario, only the creator of the invoices should be able to perform any operations on them. That’s why, in the createInvoice method, we pass the following permissions array as an argument:
[
  Permission.read(ownerRole),
  Permission.update(ownerRole),
  Permission.delete(ownerRole),
]
It’s also possible to create permissions for teams, their specific members, labels and more.
Besides the permissions, I’d like to bring your attention to another interesting thing here. Did you spot we don’t provide any filters to the listInvoices method? Since we want to fetch invoices only for the logged-in user, normally we would need to specify a filter, which usually would require the user’s ID. However, Appwrite, by default, filters collection documents based on permissions, so users will only get the documents that they have permission to read.
One last thing we need to do in the API files is to add the databaseId variable in the appwrite.api.js file.
src/api/appwrite.api.js
import { Client, Databases, Account, Storage } from "appwrite";

const client = new Client();
client
  .setEndpoint("https://cloud.appwrite.io/v1")
  .setProject(import.meta.env.VITE_APPWRITE_PROJECT_ID);

export const account = new Account(client);
export const databases = new Databases(client);
export const storage = new Storage(client);

export const databaseId = import.meta.env.VITE_APPWRITE_DATABASE_ID;
Create, Update and Delete Invoice Form
The API methods are ready, so let’s implement a form to allow users to create and update invoices. In the browser, head to the following /invoice/create path. Similarly to the authentication form, we will have one form component that will behave differently based on whether a user is trying to create a new invoice or update one. This will be determined by the presence of the invoice ID in the URL.
If you have a look at the src/main.jsx file, you will see that the Invoice component handles two route definitions—/invoice/create and /invoice/:id.
{
  path: "/invoice/create",
  element: <Invoice />,
},
{
  path: "/invoice/:id",
  element: <Invoice />,
},
We will start by creating a custom hook that will store the invoice form state.
src/views/invoice/hooks/useInvoiceForm.js
import { useState } from "react";
import { useParams } from "react-router-dom";

export const useInvoiceForm = () => {
  const params = useParams();
  const isEditMode = Boolean(params.id);
  const [form, setForm] = useState({
    invoiceId: "",
    date: "",
    dueDate: "",
    amount: "",
    description: "",
    senderName: "",
    senderAddress: "",
    senderPostcode: "",
    senderCity: "",
    senderCountry: "",
    senderEmail: "",
    senderPhone: "",
    clientName: "",
    clientAddress: "",
    clientPostcode: "",
    clientCity: "",
    clientCountry: "",
    clientEmail: "",
    clientPhone: "",
    accountName: "",
    accountSortCode: "",
    accountNumber: "",
    accountAddress: "",
    accountIban: "",
    accountPostCode: "",
    accountCity: "",
    accountCountry: "",
    paymentReceived: false,
    paymentDate: "",
  });

  const onFormChange = key => value => {
    setForm(state => ({
      ...state,
      [key]: value,
    }));
  };

  return {
    form,
    setForm,
    onFormChange,
    isEditMode,
  };
};
You might remember from the first part of this series that we have a lot of fields to deal with, as invoices can contain quite a bit of information. Therefore, we put the logic in custom hooks to keep the Invoice component succinct. The useInvoiceForm hook handles that form state and provides methods to change it. Now, we can add a custom hook to handle form submission.
src/views/invoice/hooks/useSubmitInvoice.js
import { useState } from "react";
import { createInvoice, updateInvoice } from "../../../api/invoice.api";
import toast from "react-hot-toast";
import { useUserContext } from "../../../context/user.context";
import { useNavigate } from "react-router-dom";

export const useSubmitInvoice = ({ form, isEditMode }) => {
  const { user } = useUserContext();
  const navigate = useNavigate();
  const [submitInvoiceStatus, setSubmitInvoiceStatus] = useState("IDLE");

  const onSubmitInvoice = async event => {
    event.preventDefault();
    try {
      if (submitInvoiceStatus === "PENDING") {
        return;
      }
      setSubmitInvoiceStatus("PENDING");
      const payload = {};

      for (const [key, value] of Object.entries(form)) {
        if (value !== "") {
          payload[key] = value;
        }
      }

      if (isEditMode) {
        await updateInvoice(form.$id, payload);
        toast.success("Invoice updated");
      } else {
        await createInvoice(user.$id, payload);
        toast.success("Invoice created");
      }
      setSubmitInvoiceStatus("SUCCESS");
      navigate("/");
    } catch (error) {
      console.error(error);
      setSubmitInvoiceStatus("ERROR");
    }
  };

  return {
    submitInvoiceStatus,
    onSubmitInvoice,
  };
};
The submitInvoiceStatus state will be used to show a spinner or an error when the form submission is pending or fails. This state is controlled mainly by the onSubmitInvoice handler. The onSubmitInvoice uses the isEditMode variable to determine whether it should create or update the invoice. Upon successful submission, a toast notification is shown, and the user is redirected to the invoices page. If there is a problem, the submitInvoiceStatus is set to "ERROR".
The logic to handle the invoice form submission is ready, but that’s not yet enough. If a user wants to update an invoice, we need to fetch the invoice details first. We could put the logic for it in the useInvoiceForm hook, but let’s implement a new hook called useFetchInvoice instead to keep the code lean.
src/views/invoice/hooks/useFetchInvoice.js
import { useEffect, useState } from "react";
import toast from "react-hot-toast";
import { getInvoice } from "../../../api/invoice.api";
import { formatDate } from "../../../helpers/formatDate";

export const useFetchInvoice = ({ id, onSetInvoice }) => {
  /**
   * If there is no ID, we just set the status to success, as there is no ID,
   * so the fetch request won't be executed.
   */
  const [fetchInvoiceStatus, setFetchInvoiceStatus] = useState(
    id ? "IDLE" : "SUCCESS"
  );

  const initFetchInvoice = async invoiceUid => {
    try {
      if (fetchInvoiceStatus === "PENDING") {
        return;
      }

      setFetchInvoiceStatus("PENDING");

      const invoice = await getInvoice(invoiceUid);

      onSetInvoice(currentForm => {
        const newForm = {
          $id: invoice.$id,
        };
        for (const key of Object.keys(currentForm)) {
          const value = invoice[key];

          /**
           * Format the dates
           */
          if (["date", "dueDate", "paymentDate"].includes(key) && value) {
            if (!value) {
              newForm[key] = "";
            } else {
              const [month, day, year] = formatDate(new Date(value)).split("/");
              newForm[key] = `${year}-${month}-${day}`;
            }
          } else {
            newForm[key] = value === null ? "" : value;
          }
        }
        return newForm;
      });
      setFetchInvoiceStatus("SUCCESS");
    } catch (error) {
      console.error(error);
      toast.error("There was a problem while fetching the invoice.");
      setFetchInvoiceStatus("ERROR");
    }
  };

  useEffect(() => {
    /**
     * Bail out if there is no invoice ID
     */
    if (!id) {
      return;
    }
    /**
     * We are on the edit invoice page.
     * Therefore, we need to fetch invoide details
     */
    initFetchInvoice(id);
  }, [id]);

  return {
    fetchInvoiceStatus,
    initFetchInvoice,
  };
};
useFetchInvoice utilizes useEffect and useParams hooks to run the initFetchInvoice function. This function fetches the invoice using its ID and formats the invoice data when updating the form state. The form state is updated by using the onSetInvoice that is passed to the useFetchInvoice hook. We also need to create the formatDate helper. It will take care of displaying dates in a more readable format.
src/helpers/formatDate.js
export const formatDate = (date, options) => {
  if (!date) return "";
  return new Intl.DateTimeFormat("en-US", {
    day: "2-digit",
    month: "2-digit",
    year: "numeric",
    ...options,
  }).format(date);
};
In this example, we are passing the en-US locale to the Intl.DateTimeFormat method, but if you are up for a challenge then you can try providing a custom locale based on the user’s location.
Now, let’s add a hook to handle invoice deletion.
src/views/invoice/hooks/useDeleteInvoice.js
import { useState } from "react";
import toast from "react-hot-toast";
import { useNavigate } from "react-router-dom";
import { deleteInvoice } from "../../../api/invoice.api";

export const useDeleteInvoice = ({ invoiceId }) => {
  const navigate = useNavigate();
  const [deleteInvoiceStatus, setDeleteInvoiceStatus] = useState("IDLE");

  const initDeletePrompt = async () => {
    if (deleteInvoiceStatus === "PENDING") {
      return;
    }
    const result = window.confirm(
      "Are you sure you want to delete this invoice?"
    );

    if (!result) {
      return;
    }

    try {
      setDeleteInvoiceStatus("PENDING");
      await deleteInvoice(invoiceId);
      setDeleteInvoiceStatus("SUCCESS");
      toast.success("Invoice deleted");
      navigate("/");
    } catch (error) {
      console.error(error);
      toast.error("Could not delete the invoice");
      setDeleteInvoiceStatus("ERROR");
    }
  };

  return {
    deleteInvoiceStatus,
    initDeletePrompt,
  };
};
Again, we have a state that is responsible for storing the status of the deletion and the initDeletePrompt method. Before triggering a delete action, it’s a good idea to ask a user to confirm whether they really want to proceed with deletion. After all, who has never clicked a delete button by accident? In this case, we just use the window.confirm method as it’s sufficient for this tutorial.
Now we have hooks that handle invoice fetching, form submission and deletion. It’s time to finally create the invoice form. Let’s head to the Invoice.jsx file.
src/views/invoice/Invoice.jsx
import { Link, useParams } from "react-router-dom";
import BankDetails from "./components/BankDetails";
import ClientDetails from "./components/ClientDetails";
import InvoiceDetails from "./components/InvoiceDetails";
import SenderDetails from "./components/SenderDetails";
import { useDeleteInvoice } from "./hooks/useDeleteInvoice";
import { useFetchInvoice } from "./hooks/useFetchInvoice";
import { useInvoiceForm } from "./hooks/useInvoiceForm";
import { useSubmitInvoice } from "./hooks/useSubmitInvoice";

const config = {
  create: {
    submitButtonText: "Create",
  },
  update: {
    submitButtonText: "Update",
  },
};

const Invoice = () => {
  const params = useParams();
  const { isEditMode, form, setForm, onFormChange } = useInvoiceForm();

  const { fetchInvoiceStatus, initFetchInvoice } = useFetchInvoice({
    id: params.id,
    onSetInvoice: setForm,
  });

  const { submitInvoiceStatus, onSubmitInvoice } = useSubmitInvoice({
    form,
    isEditMode,
  });

  const { deleteInvoiceStatus, initDeletePrompt } = useDeleteInvoice({
    invoiceId: form.$id,
  });

  const { submitButtonText } = isEditMode ? config.update : config.create;

  return (
    <div className="flex items-center justify-center w-full min-h-screen bg-gradient-to-r from-pink-300 via-purple-300 to-indigo-400">
      <div className="min-h-screen px-8 pb-16 bg-white md:w-3/4 md:ml-auto md:pr-0 md:pl-16 md:pb-24">
        <div className="flex items-center justify-between mr-8">
          <h1 className="my-8 text-2xl font-semibold text-indigo-900">
            Invoice
          </h1>
          <Link
            className="text-sm transition-all duration-150 text-indigo-900/50 hover:text-indigo-900"
            to="/"
          >
            Back To Invoices
          </Link>
        </div>
        {fetchInvoiceStatus === "PENDING" ? (
          <div>Fetching invoice data...</div>
        ) : null}
        {fetchInvoiceStatus === "ERROR" ? (
          <div>
            <button
              className="px-4 py-2 bg-indigo-600 rounded-md text-indigo-50"
              onClick={() => initFetchInvoice(params.id)}
            >
              Try Again
            </button>
          </div>
        ) : null}
        {fetchInvoiceStatus === "SUCCESS" ? (
          <form
            className="flex flex-col max-w-5xl gap-8"
            onSubmit={onSubmitInvoice}
          >
            <div className="flex flex-col gap-8 md:gap-12">
              <InvoiceDetails form={form} onFormChange={onFormChange} />
              <SenderDetails form={form} onFormChange={onFormChange} />
              <ClientDetails form={form} onFormChange={onFormChange} />
              <BankDetails form={form} onFormChange={onFormChange} />
            </div>
            <div className="flex justify-between">
              <button
                type="button"
                className="min-w-[6rem] px-4 py-3 mr-4 font-semibold text-indigo-800 transition-colors duration-150 bg-indigo-200/25 rounded-md hover:bg-rose-800 hover:text-rose-100"
                onClick={initDeletePrompt}
              >
                {deleteInvoiceStatus === "PENDING" ? "Deleting..." : "Delete"}
              </button>

              <button
                type="submit"
                className="min-w-[6rem] px-4 py-3 mr-8 font-semibold text-indigo-100 transition-colors duration-150 bg-indigo-600 rounded-md hover:bg-indigo-800"
              >
                {submitInvoiceStatus === "PENDING"
                  ? "Submitting..."
                  : submitButtonText}
              </button>
            </div>
          </form>
        ) : null}
      </div>
    </div>
  );
};

export default Invoice;
In the Invoice component, we use the custom hooks we just created. The submit button’s text is computed using the isEditMode and submitInvoiceStatus values. If the invoice submission is in progress, it displays Submitting... text. Otherwise, it will be either Create or Update.
To make things more maintainable, the invoice form is split into four components—InvoiceDetails, SenderDetails, ClientDetails and BankDetails. These components receive the form state and onFormChange method. Let’s create them now.
src/views/invoice/components/InvoiceDetails.jsx
import Input from "../../../components/form/Input";

const InvoiceDetails = props => {
  const { form, onFormChange } = props;

  return (
    <div>
      <div>
        <h2 className="mb-4 text-sm font-semibold text-indigo-600/75">
          Invoice Details
        </h2>
      </div>

      <div className="flex flex-wrap gap-x-8 gap-y-4 md:[&>*]:basis-[calc(50%-2rem)]">
        <Input
          label="Invoice ID"
          required
          value={form.invoiceId}
          onChange={onFormChange("invoiceId")}
        />
        <Input
          label="Invoice Date"
          type="date"
          required
          value={form.date}
          onChange={onFormChange("date")}
        />
        <Input
          label="Invoice Due Date"
          type="date"
          required
          value={form.dueDate}
          onChange={onFormChange("dueDate")}
        />
        <Input
          label="Invoice Amount"
          value={form.amount}
          required
          onChange={onFormChange("amount")}
        />

        <Input
          rootProps={{
            style: {
              flexBasis: "calc(100% - 2rem)",
            },
          }}
          label="Description"
          required
          value={form.description}
          onChange={onFormChange("description")}
        />

        <Input
          label="Payment Date"
          type="date"
          value={form.paymentDate}
          onChange={onFormChange("paymentDate")}
        />

        <div className="flex flex-col w-full gap-1">
          <label className="text-sm text-indigo-950/75">Payment Received</label>
          <div className="flex gap-4">
            <button
              type="button"
              className={`flex-grow px-4 py-2 rounded-md ${
                form.paymentReceived
                  ? "bg-indigo-100"
                  : "bg-indigo-600 text-indigo-100"
              }`}
              onClick={() => {
                onFormChange("paymentReceived")(false);
              }}
            >
              No
            </button>
            <button
              type="button"
              className={`flex-grow px-4 py-2 rounded-md ${
                form.paymentReceived
                  ? "bg-indigo-600 text-indigo-100"
                  : "bg-indigo-100"
              }`}
              onClick={() => {
                onFormChange("paymentReceived")(true);
              }}
            >
              Yes
            </button>
          </div>
        </div>
      </div>
    </div>
  );
};

export default InvoiceDetails;
src/views/invoice/components/SenderDetails.jsx
import Input from "../../../components/form/Input";

const SenderDetails = props => {
  const { form, onFormChange } = props;

  return (
    <div>
      <h2 className="mb-4 text-sm font-semibold text-indigo-600/75">
        Sender Details
      </h2>

      <div className="flex flex-wrap gap-x-8 gap-y-4 md:[&>*]:basis-[calc(50%-2rem)]">
        <Input
          label="Name"
          value={form.senderName}
          onChange={onFormChange("senderName")}
        />
        <Input
          label="Address"
          value={form.senderAddress}
          onChange={onFormChange("senderAddress")}
        />
        <Input
          label="Postcode"
          value={form.senderPostcode}
          onChange={onFormChange("senderPostcode")}
        />
        <Input
          label="City"
          value={form.senderCity}
          onChange={onFormChange("senderCity")}
        />
        <Input
          label="Country"
          value={form.senderCountry}
          onChange={onFormChange("senderCountry")}
        />
        <Input
          label="Email"
          value={form.senderEmail}
          onChange={onFormChange("senderEmail")}
        />
        <Input
          label="Phone"
          value={form.senderPhone}
          onChange={onFormChange("senderPhone")}
        />
      </div>
    </div>
  );
};

export default SenderDetails;
src/views/invoice/components/ClientDetails.jsx
import Input from "../../../components/form/Input";

const ClientDetails = props => {
  const { form, onFormChange } = props;

  return (
    <div>
      <h2 className="mb-4 text-sm font-semibold text-indigo-600/75">
        Client Details
      </h2>
      <div className="flex flex-wrap gap-x-8 gap-y-4 md:[&>*]:basis-[calc(50%-2rem)]">
        <Input
          label="Client Name"
          value={form.clientName}
          onChange={onFormChange("clientName")}
        />
        <Input
          label="Client Address"
          value={form.clientAddress}
          onChange={onFormChange("clientAddress")}
        />
        <Input
          label="Client Postcode"
          value={form.clientPostcode}
          onChange={onFormChange("clientPostcode")}
        />
        <Input
          label="Client City"
          value={form.clientCity}
          onChange={onFormChange("clientCity")}
        />
        <Input
          label="Client Country"
          value={form.clientCountry}
          onChange={onFormChange("clientCountry")}
        />
        <Input
          label="Client Email"
          value={form.clientEmail}
          onChange={onFormChange("clientEmail")}
        />
        <Input
          label="Client Phone"
          value={form.clientPhone}
          onChange={onFormChange("clientPhone")}
        />
      </div>
    </div>
  );
};

export default ClientDetails;
src/views/invoice/components/BankDetails.jsx
import Input from "../../../components/form/Input";

const BankDetails = props => {
  const { form, onFormChange } = props;

  return (
    <div>
      <h2 className="mb-4 text-sm font-semibold text-indigo-600/75">
        Bank Details
      </h2>

      <div className="flex flex-wrap gap-x-8 gap-y-4 md:[&>*]:basis-[calc(50%-2rem)]">
        <Input
          label="Account Name"
          value={form.accountName}
          onChange={onFormChange("accountName")}
        />
        <Input
          label="Account Number"
          value={form.accountNumber}
          onChange={onFormChange("accountNumber")}
        />
        <Input
          label="Sort Code"
          value={form.accountSortCode}
          onChange={onFormChange("accountSortCode")}
        />

        <Input
          label="IBAN"
          value={form.accountIban}
          onChange={onFormChange("accountIban")}
        />
        <Input
          label="Address"
          value={form.accountAddress}
          onChange={onFormChange("accountAddress")}
        />
        <Input
          label="Postcode"
          value={form.accountPostCode}
          onChange={onFormChange("accountPostCode")}
        />
        <Input
          label="City"
          value={form.accountCity}
          onChange={onFormChange("accountCity")}
        />
        <Input
          label="Country"
          value={form.accountCountry}
          onChange={onFormChange("accountCountry")}
        />
      </div>
    </div>
  );
};

export default BankDetails;
The four components mainly comprise Input components that are needed for the invoice form. To keep things simple, we are not implementing validation, as the form is really big and form validation is not the main focus of this series. However, if you are up for a challenge, you can try adding it yourself.
The GIF below shows what the invoice form should look like now.
Now, you can fill in all the form fields and click on the Create button. A new invoice should be created, and you should be redirected to the invoices page, which at the moment will not display the newly created invoice. After all, we still need to create this functionality. Let’s do it next. If you are still on the invoice form page, you can click on the Back To Invoices link.
View Invoices
We will start by creating a custom hook called useFetchInvoicesList.
src/views/invoice/hooks/useFetchInvoicesList.js
import { useEffect, useState } from "react";
import { listInvoices } from "../../../api/invoice.api";
import { formatDate } from "../../../helpers/formatDate";

export const useFetchInvoicesList = () => {
  const [invoices, setInvoices] = useState([]);
  const [fetchInvoicesStatus, setFetchInvoiceStatus] = useState("IDLE");

  const initFetchInvoices = async () => {
    try {
      setFetchInvoiceStatus("PENDING");

      const result = await listInvoices();
      const formattedInvoices = result.documents.map(invoice => {
        const { date, dueDate, ...invoiceData } = invoice;
        return {
          ...invoiceData,
          date: formatDate(new Date(date)),
          dueDate: formatDate(new Date(dueDate)),
        };
      });

      setInvoices(formattedInvoices);
      setFetchInvoiceStatus("SUCCESS");
    } catch (error) {
      console.error(error);
      setFetchInvoiceStatus("ERROR");
    }
  };

  useEffect(() => {
    initFetchInvoices();
  }, []);

  return {
    invoices,
    fetchInvoicesStatus,
  };
};
The useFetchInvoicesList hook is very similar to other hooks we created. It contains the invoices state, which will store the fetched data and the fetchInvoicesStatus state, which handles the progress of the API request. The initFetchInvoices function retrieves the invoices from the server and formats the data before updating the invoices state.
Finally, let’s update the ViewInvoices component.
src/views/invoice/ViewInvoices.jsx
import { Link } from "react-router-dom";
import { useFetchInvoicesList } from "./hooks/useFetchInvoicesList";
const ViewInvoices = () => {
const { invoices, fetchInvoicesStatus } = useFetchInvoicesList();
return (
<div className="flex items-center justify-center w-full min-h-screen text-indigo-900 bg-gradient-to-r from-pink-300 via-purple-300 to-indigo-400">
<div className="p-4 bg-white rounded-lg lg:p-8">
<div className="flex items-center justify-between gap-4 mb-8 ">
<h1 className="text-2xl font-semibold">Invoices</h1>
<Link
to="/invoice/create"
className="px-4 py-2 transition-colors duration-150 bg-indigo-50 hover:bg-indigo-600 hover:text-indigo-100"
>
Create Invoice
</Link>
</div>
{fetchInvoicesStatus === "SUCCESS" ? (
invoices.length ? (
<div>
<div className="items-start hidden lg:flex gap-x-8 lg:gap-x-16">
<span className="w-16 font-semibold text-indigo-600">ID</span>
<span className="w-32 font-semibold text-indigo-600">
Client
</span>
<span className="w-16 font-semibold text-indigo-600">
Amount
</span>
<span className="w-24 font-semibold text-indigo-600">Date</span>
<span className="w-24 font-semibold text-indigo-600">
Due Date
</span>
<span className="font-semibold text-indigo-600 w-36">
Payment Received
</span>
</div>
<ul className="mt-2">
{invoices.map(invoice => {
const {
$id,
invoiceId,
amount,
clientName,
date,
dueDate,
paymentReceived,
} = invoice;
return (
<li
key={$id}
className="px-4 py-2 lg:p-0 max-lg:my-4 max-lg:bg-indigo-50/50"
>
<Link
to={`/invoice/${$id}`}
className="p-2 -mx-2 rounded-md grid grid-cols-2 gap-y-4 lg:gap-y-0 lg:flex lg:flex-nowrap gap-x-8 lg:gap-x-16 lg:hover:bg-indigo-50 min-w-[15rem] sm:min-w-[20rem]"
>
<div className="flex flex-col lg:w-16">
<span className="text-sm text-indigo-600 lg:hidden">
ID
</span>
<span>{invoiceId}</span>
</div>
<div className="flex flex-col lg:w-32">
<span className="text-sm text-indigo-600 lg:hidden">
Client
</span>
<span>{clientName}</span>
</div>
<div className="flex flex-col lg:w-16">
<span className="text-sm text-indigo-600 lg:hidden">
Amount
</span>
<span>{amount}</span>
</div>
<div className="flex flex-col lg:w-24">
<span className="text-sm text-indigo-600 lg:hidden">
Date
</span>
<span>{date}</span>
</div>
<div className="flex flex-col lg:w-24">
<span className="text-sm text-indigo-600 lg:hidden">
Due Date
</span>
<span>{dueDate}</span>
</div>
<div className="flex flex-col lg:w-36">
<span className="text-sm text-indigo-600 lg:hidden">
Payment Received
</span>
<span>{paymentReceived ? "Yes" : "No"}</span>
</div>
</Link>
</li>
);
})}
</ul>
</div>
) : (
<Link
to="/invoice/create"
className="font-semibold text-indigo-600"
>
You have no invoices. Let's create one!
</Link>
)
) : (
<p>Loading invoices...</p>
)}
</div>
</div>
);
};
export default ViewInvoices;
The image below shows what the view invoices page looks like.
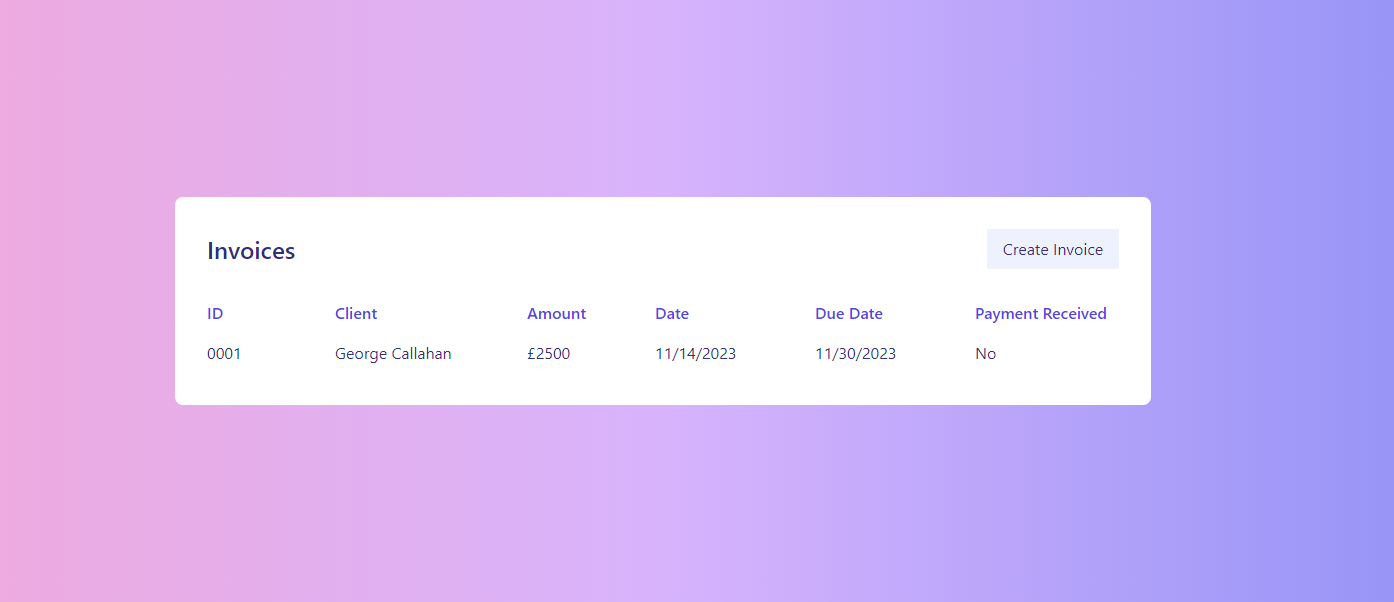
Clicking on an invoice item will redirect a user to the update invoice form. Besides the invoices list, we also have the Create Invoice button, which will redirect users to the create invoice form. Now you can test the update and delete functionality, since we didn’t have an opportunity to do that yet.
Conclusion
In this part, we have covered how to perform CRUD operations with Appwrite. We created a page with the invoice form that allows users to create, update and delete invoices. We also added the View Invoices page, so users are able to view their own invoices. In the next part, we will have a look at Appwrite Functions and Storage and combine them to create functionality that will automatically create PDF files.

Thomas Findlay
Thomas Findlay is a 5-star rated mentor, full-stack developer, consultant, technical writer and the author of “React - The Road To Enterprise” and “Vue - The Road To Enterprise.” He works with many different technologies such as JavaScript, Vue, React, React Native, Node.js, Python, PHP and more. Thomas has worked with developers and teams from beginner to advanced and helped them build and scale their applications and products. Check out his Codementor page, and you can also find him on Twitter.
Related Posts
Comments
All articles
Topics

Latest Stories
in Your Inbox
Subscribe to be the first to get our expert-written articles and tutorials for developers!
All fields are required