
Getting Started with Appwrite (Part 4/4): Creating Invoice PDF with Functions and Storage

This series on Appwrite, a BaaS platform, shows authentication flow, database storage and serverless functions in a React invoicing app. In Part 4, we delve into Appwrite CLI, functions and storage. When an invoice is created, updated or deleted, its PDF will do the same in Appwrite storage.
Welcome to the last part of the “Getting Started with Appwrite” series. In the previous part, we implemented invoice form and view invoice pages with functionality that allows users to create, read, update and delete invoices. In this part, we will explore Appwrite Functions and Storage. Specifically, we will:
- Delve into Appwrite CLI to handle Appwrite Functions
- Create a PDF with invoice details and store it in the Appwrite Storage when an invoice is created
- Delete the current PDF file and create a new one when an invoice is updated
- Delete the invoice PDF file when the invoice is deleted
Let’s get started by installing and configuring the Appwrite CLI, as we will use it to create a function to handle invoice PDFs.
Appwrite CLI
There are a few ways to install Appwrite CLI, but the simplest is by running the npm command and installing it globally.
$ npm install -g appwrite-cli
After the installation is complete, verify it by checking the CLI’s version.
$ appwrite -v
```part

If the installation was successful, the next step is to log in.

```shell
$ appwrite login
After logging in, we need to connect our project.
$ appwrite init project
Choose the “Link this directory to an existing Appwrite project” option and select the invoice project.
You will be asked to enter your email, password and Appwrite server endpoint. If you signed up using your GitHub account, you need to visit your account page on the Appwrite website and go through the password recovery process to set up a new password. The Appwrite server endpoint should be https://cloud.appwrite.io/v1. You can also find the endpoint value in your project’s settings.
That’s it for the Appwrite CLI setup. Next, let’s create a new Appwrite Function.
Creating an Appwrite Function
Appwrite functions can be created in two ways. The first way is to simply do it through the Appwrite functions dashboard. We can connect a Git repository Appwrite and then select one of the starter templates.
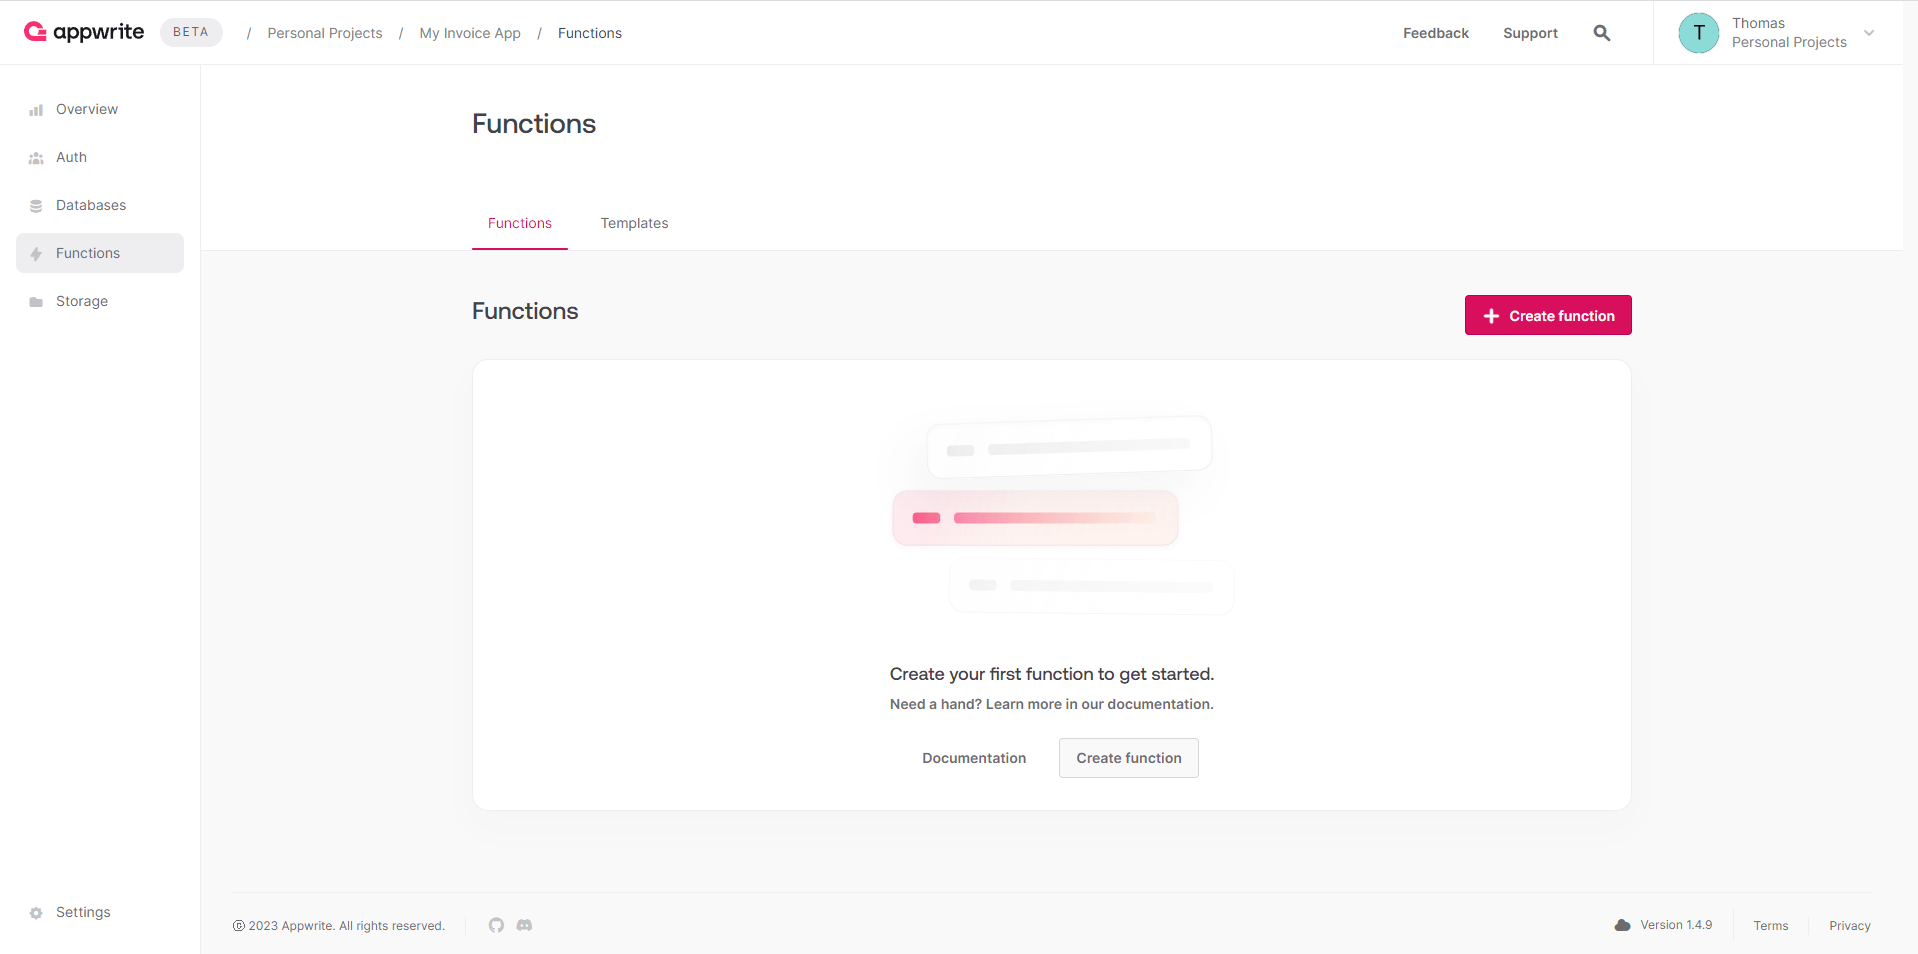
The second way is to use the Appwrite CLI and do it from within a project’s codebase. We will go with the latter approach.
Run the command below to create a new Appwrite function.
$ appwrite init function
You will be prompted to answer a few questions. You can name the function onInvoiceChange. You don’t have to provide an ID as one will be generated for you. As for the runtime, select the latest Node one. The CLI should now have scaffolded a new function inside of the functions directory.
Move in the terminal to the newly created function’s folder by running cd functions/onInvoiceChange command. To create a PDF file, we will use the pdf-lib library, so let’s install it.
$ npm install pdf-lib
Next, we need to configure when we want the function to run. With Appwrite, functions can be executed in multiple ways. We can simply make an API request or use Appwrite’s SDK or dashboard to execute a function. Appwrite also supports scheduled functions using cron expressions. Last but not least, functions can also be executed in response to events, such as collection or document CRUD actions, storage bucket actions or team and user changes.
In this scenario, we want to do something when an invoice is created, updated or deleted. Therefore, we will configure the function to be executed via events.
A function’s settings can be changed either via the Appwrite dashboard or the appwrite.json file that was automatically created when we ran the appwrite init function command. We will configure the function using the JSON file for two reasons. First, we keep all the configuration in the code so it’s easily accessible. Second, whenever a function is deployed via CLI, the configuration from appwrite.json file overrides the one entered through the dashboard settings.
Let’s update the appwrite.json file. Replace the empty "events": [] array with the snippet below. However, make sure to replace <INVOICE COLLECTION ID> with the ID of your invoice collection.
"events": [
  "databases.*.collections.<INVOICE COLLECTION ID>.documents.*.create",
  "databases.*.collections.<INVOICE COLLECTION ID>.documents.*.update",
  "databases.*.collections.<INVOICE COLLECTION ID>.documents.*.delete"
],
Below you can see what the appwrite.json file should look like:
appwrite.json
{
  "projectId": "<YOUR PROJECT ID>",
  "projectName": "<YOUR PROJECT NAME>",
  "functions": [
    {
      "$id": "654a6589a133aa745b76",
      "name": "onInvoiceChange",
      "runtime": "node-18.0",
      "execute": [],
      "events": [
        "databases.*.collections.<INVOICE COLLECTION ID>.documents.*.create",
        "databases.*.collections.<INVOICE COLLECTION ID>.documents.*.update",
        "databases.*.collections.<INVOICE COLLECTION ID>.documents.*.delete"
      ],
      "schedule": "",
      "timeout": 15,
      "enabled": true,
      "logging": true,
      "entrypoint": "src/main.js",
      "commands": "npm install",
      "ignore": ["node_modules", ".npm"],
      "path": "functions/onInvoiceChange"
    }
  ]
}
Here’s the breakdown of the events’ structure we defined:
service.serviceId.resource.resourceId.resource.resourceId.action
And to be more specific, in the events we are configuring, they have the following structure:
databases.databaseId.collections.collectionId.documents.documentId.action
There are many events that a function can react to. You can find possible event combinations here. Appwrite provides a nice UI to add events and I can definitely recommend trying it out. The GIF below shows what it looks like.
However, do not configure any events for the onInvoiceChange function through the dashboard, as we are using the appwrite.json file for that.
Next, we need to configure environment variables which we will use in the onInvoiceChange function. We will need to create the following:
- APPWRITE_BUCKET_ID – The ID of the storage bucket.
- APPWRITE_PROJECT_ID – The ID of the Appwrite project.
- APPWRITE_SERVER_ENDPOINT – The endpoint of the Appwrite Cloud server
- APPWRITE_SERVER_API_KEY – A custom API key that grants the function access to perform actions, such as creating or deleting a file from the storage.
Before we start adding environment variables, let’s add the APPWRITE_SERVER_API_KEY key.
Go through the following pages and click on the “Create API Key” button to configure a new server API key that we will use in the onInvoiceChange function.
Appwrite Dashboard -> Project Settings -> Overview -> View API Keys -> Create API Key
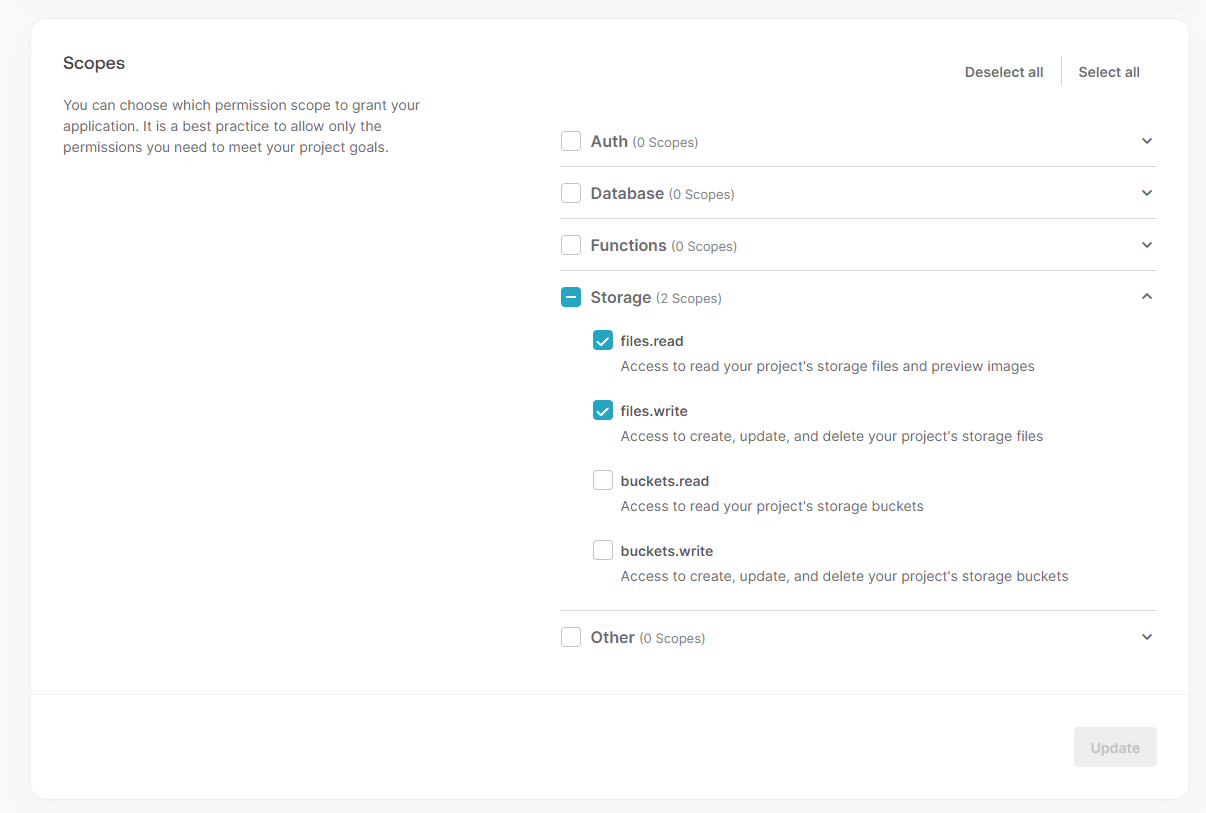
You should see the “Create an API key” form, as shown on the image below.
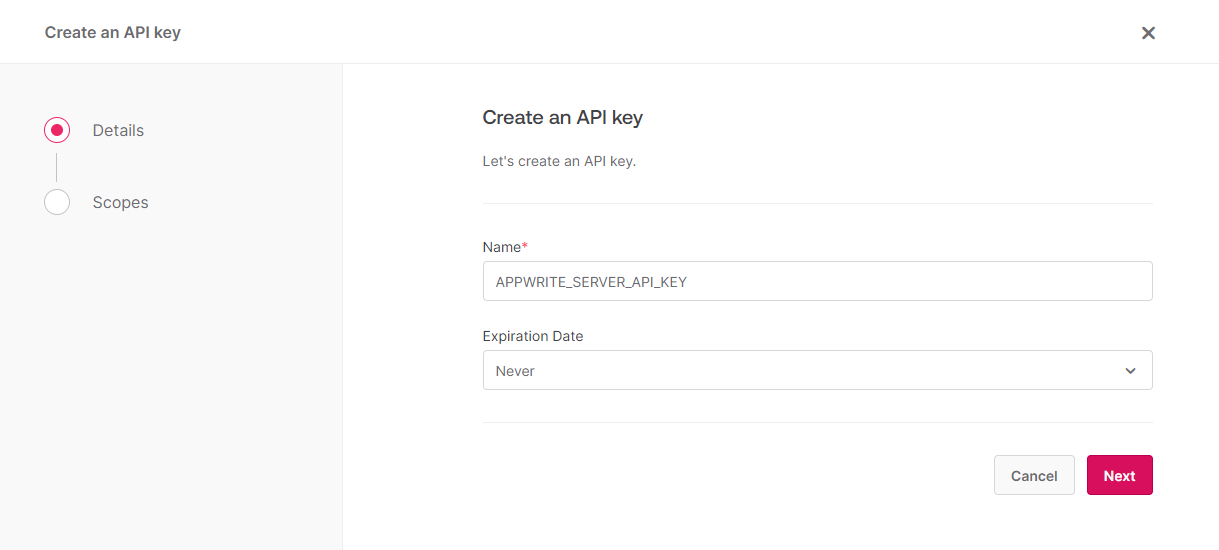
Now, we need to configure the scopes the API key should grant access to.
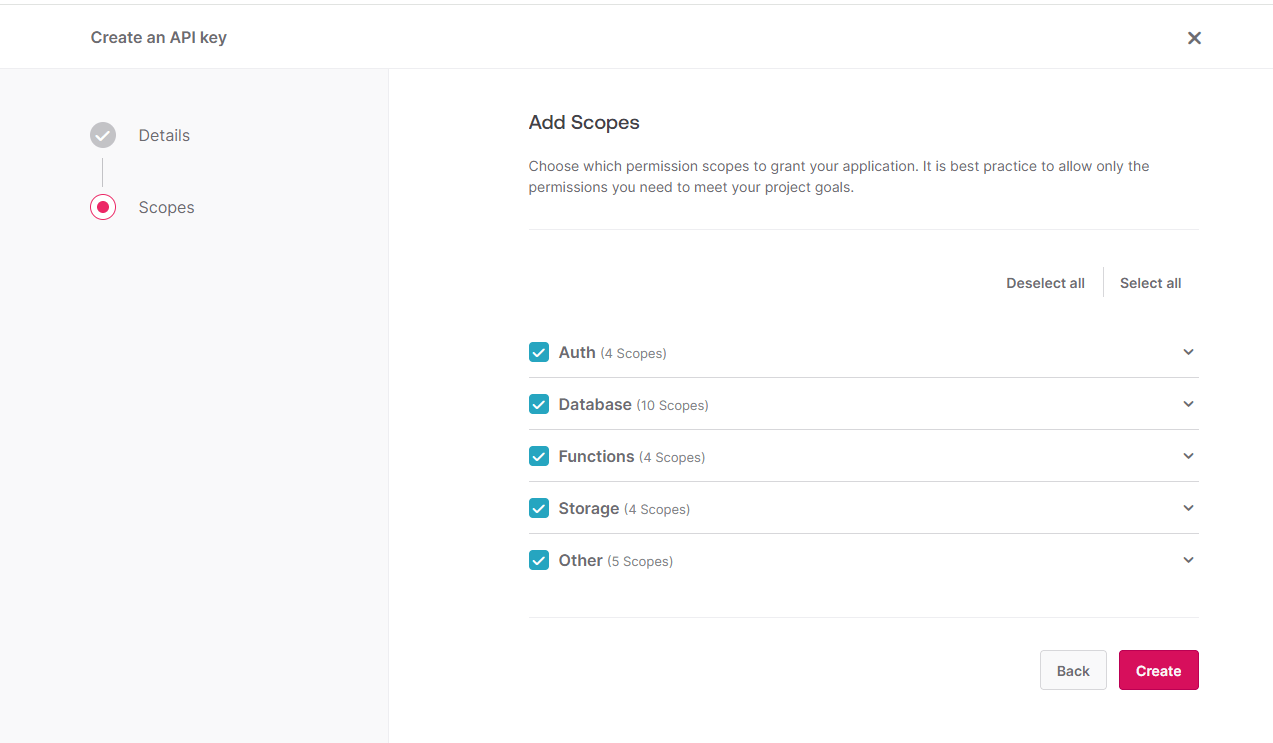
For the purpose of this tutorial, you can just grant all scopes. However, for real applications, it’s a good practice to follow the principle of lowest privilege. Basically, instead of giving access to everything, grant access only to the resources that are needed. Therefore, following this principle, the onInvoiceChange function should only have access to storage files.read and files.write scopes, as it doesn’t do anything besides uploading and deleting files from the storage.
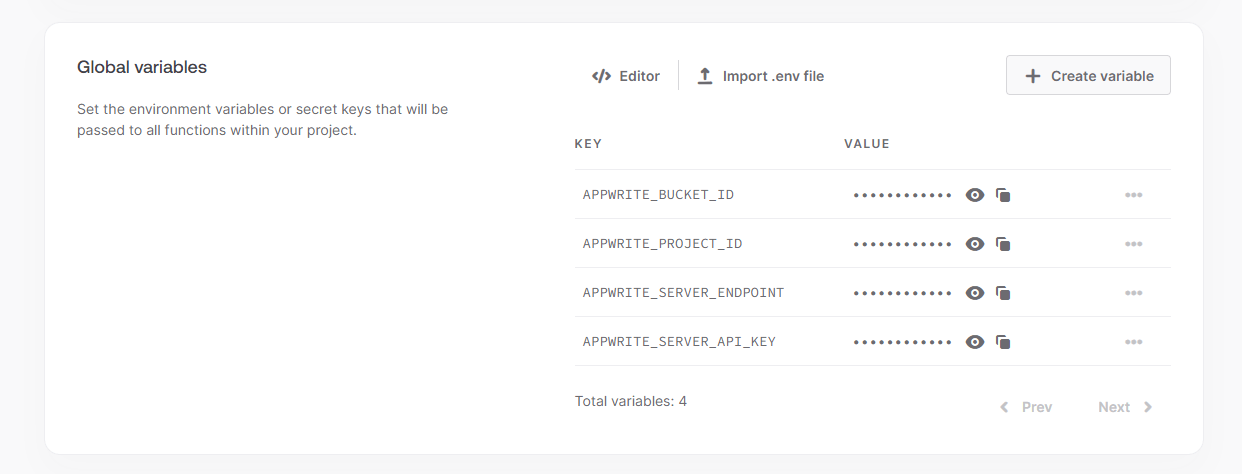
Next, let’s add the following global variables to the project. In the project settings, find the Global variables section and add APPWRITE_BUCKET_ID, APPWRITE_PROJECT_ID, APPWRITE_SERVER_ENDPOINT and APPWRITE_SERVER_API_KEY.
The first two you can find in the .env file, which we created in the first part of this series. The APPWRITE_SERVER_ENDPOINT you can copy from the src/api/appwrite.api.js file or from the project settings. The APPWRITE_SERVER_API_KEY we created just a moment ago. Your global variables section should look like the image below.
That’s enough for the configuration part. Let’s head to the entry file for the onInvoiceChange function and modify it so it handles the creation and deletion of PDF files.
Here’s the full function.
functions/onInvoiceChange/src/main.js
/* global process */
import { Client, Storage, InputFile, Permission, Role } from 'node-appwrite';
import { createInvoicePdf } from './helpers/createInvoicePdf.js';
import { Buffer } from 'node:buffer';

const APPWRITE_BUCKET_ID = process.env.APPWRITE_BUCKET_ID;
const APPWRITE_SERVER_API_KEY = process.env.APPWRITE_SERVER_API_KEY;
const APPWRITE_PROJECT_ID = process.env.APPWRITE_PROJECT_ID;
const APPWRITE_SERVER_ENDPOINT = process.env.APPWRITE_SERVER_ENDPOINT;

const onCreateInvoice = async ({ req, res, storage }) => {
  const { $id } = req.body;
  const { pdfBytes } = await createInvoicePdf(req.body);
  const buffer = Buffer.from(pdfBytes);
  const userId = req.headers['x-appwrite-user-id'];
  const fileId = `INVOICE_${$id}`;
  const filename = `${fileId}.pdf`;
  const ownerRole = Role.user(userId);
  await storage.createFile(
    APPWRITE_BUCKET_ID,
    fileId,
    InputFile.fromBuffer(buffer, filename),
    [
      Permission.read(ownerRole),
      Permission.update(ownerRole),
      Permission.delete(ownerRole),
    ]
  );

  return res.json({
    message: 'Invoice created',
  });
};

const onUpdateInvoice = async ({ log, req, res, storage }) => {
  const { $id } = req.body;
  const { pdfBytes } = await createInvoicePdf(req.body);
  const buffer = Buffer.from(pdfBytes);
  const fileId = `INVOICE_${$id}`;
  const filename = `${fileId}.pdf`;
  const userId = req.headers['x-appwrite-user-id'];
  const ownerRole = Role.user(userId);

  try {
    await storage.deleteFile(APPWRITE_BUCKET_ID, fileId);
  } catch (err) {
    log(err);
    log(`Could not delete invoice file with ID ${fileId} `);
  }

  await storage.createFile(
    APPWRITE_BUCKET_ID,
    fileId,
    InputFile.fromBuffer(buffer, filename),
    [
      Permission.read(ownerRole),
      Permission.update(ownerRole),
      Permission.delete(ownerRole),
    ]
  );
  return res.json({
    message: 'Invoice updated',
  });
};

const onDeleteInvoice = async ({ req, res, error, storage }) => {
  const { $id } = req.body;
  const fileId = `INVOICE_${$id}`;

  try {
    await storage.deleteFile(APPWRITE_BUCKET_ID, fileId);
  } catch (err) {
    error(error);
  }
  return res.json({
    message: 'Deleted',
  });
};

const eventHandlers = {
  create: onCreateInvoice,
  update: onUpdateInvoice,
  delete: onDeleteInvoice,
};

export default async ({ req, res, log, error }) => {
  if (req.method !== 'POST') {
    return res.send('Method not allowed', 403);
  }

  if (!req.body.invoiceId) {
    return res.send('Missing invoice ID', 403);
  }

  if (req.headers['x-appwrite-trigger'] !== 'event') {
    return res.send('Execution method not allowed.', 403);
  }

  const eventType = req.headers['x-appwrite-event'].split('.').at(-1);

  if (!Object.hasOwn(eventHandlers, eventType)) {
    return res.send('Event not supported', 403);
  }

  const handler = eventHandlers[eventType];

  const client = new Client()
    .setEndpoint(APPWRITE_SERVER_ENDPOINT)
    .setProject(APPWRITE_PROJECT_ID)
    .setKey(APPWRITE_SERVER_API_KEY);
  const storage = new Storage(client);

  return handler({ req, res, log, error, client, storage });
};
There is quite a bit happening in this function, so let’s go through it step by step. We will start from the entry point, which is the main function handler.
const eventHandlers = {
  create: onCreateInvoice,
  update: onUpdateInvoice,
  delete: onDeleteInvoice,
};

export default async ({ req, res, log, error }) => {
  if (req.method !== 'POST') {
    return res.send('Method not allowed', 403);
  }

  if (!req.body.invoiceId) {
    return res.send('Missing invoice ID', 403);
  }

  if (req.headers['x-appwrite-trigger'] !== 'event') {
    return res.send('Execution method not allowed.', 403);
  }

  const eventType = req.headers['x-appwrite-event'].split('.').at(-1);

  if (!Object.hasOwn(eventHandlers, eventType)) {
    return res.send('Event not supported', 403);
  }

  const handler = eventHandlers[eventType];

  const client = new Client()
    .setEndpoint(APPWRITE_SERVER_ENDPOINT)
    .setProject(APPWRITE_PROJECT_ID)
    .setKey(APPWRITE_SERVER_API_KEY);
  const storage = new Storage(client);

  return handler({ req, res, log, error, client, storage });
};
First, we perform some validation and assert that:
- The request method is
POST. - The
invoiceIdis present in the body payload. - The
x-appwrite-triggerheader is present and is of typeevent. After all, we want this function to be triggered only as a response to an event.
Next, we extract the event type from the x-appwrite-event header. We configured three events for this function, so the event type should be either create, update or delete.
We use the event type to get the correct handler from the eventHandlers object. When we get the correct handler, we initialize the Appwrite client, a storage instance, and execute the handler.
Let’s have a look at each of the handlers now, starting with onCreateInvoice.
const onCreateInvoice = async ({ req, res, storage }) => {
  const { $id } = req.body;
  const { pdfBytes } = await createInvoicePdf(req.body);
  const buffer = Buffer.from(pdfBytes);
  const userId = req.headers['x-appwrite-user-id'];
  const fileId = `INVOICE_${$id}`;
  const filename = `${fileId}.pdf`;
  const ownerRole = Role.user(userId);
  await storage.createFile(
    APPWRITE_BUCKET_ID,
    fileId,
    InputFile.fromBuffer(buffer, filename),
    [
      Permission.read(ownerRole),
      Permission.update(ownerRole),
      Permission.delete(ownerRole),
    ]
  );

  return res.json({
    message: 'Invoice created',
  });
};
In the onCreateInvoice handler, we use the createInvoicePdf helper to create a PDF with the invoice details. We will create this helper in a moment.
After the invoice is ready, we use the storage.createFile to upload the generated invoice to the storage. Note how we pass the permissions to allow the user to read, update and delete the file. After the invoice is created, we send a successful response.
The onUpdateInvoice is very similar to the onCreateInvoice handler.
const onUpdateInvoice = async ({ log, req, res, storage }) => {
  const { $id } = req.body;
  const { pdfBytes } = await createInvoicePdf(req.body);
  const buffer = Buffer.from(pdfBytes);
  const fileId = `INVOICE_${$id}`;
  const filename = `${fileId}.pdf`;
  const userId = req.headers['x-appwrite-user-id'];
  const ownerRole = Role.user(userId);

  try {
    await storage.deleteFile(APPWRITE_BUCKET_ID, fileId);
  } catch (err) {
    log(err);
    log(`Could not delete invoice file with ID ${fileId} `);
  }

  await storage.createFile(
    APPWRITE_BUCKET_ID,
    fileId,
    InputFile.fromBuffer(buffer, filename),
    [
      Permission.read(ownerRole),
      Permission.update(ownerRole),
      Permission.delete(ownerRole),
    ]
  );
  return res.json({
    message: 'Invoice updated',
  });
};
The main difference is that before creating a new file, we first try to delete an already existing file using the storage.deleteFile method.
Finally, the onDeleteInvoice just deletes the invoice PDF.
const onDeleteInvoice = async ({ req, res, error, storage }) => {
  const { $id } = req.body;
  const fileId = `INVOICE_${$id}`;

  try {
    await storage.deleteFile(APPWRITE_BUCKET_ID, fileId);
  } catch (err) {
    error(error);
  }
  return res.json({
    message: 'Deleted',
  });
};
Below you can see the code for the createInvoicePdf helper. It uses pdf-lib to create the invoice PDF.
functions/onInvoiceChange/src/helpers/createInvoicePdf.js
import { PDFDocument, PageSizes, StandardFonts } from 'pdf-lib';

const fontSize = {
  heading: 20,
  text: 14,
};

export const createInvoicePdf = async (invoiceData) => {
  const {
    invoiceId,
    date,
    dueDate,
    amount,
    description,
    senderName,
    senderAddress,
    senderPostcode,
    senderCity,
    senderCountry,
    senderPhone,
    senderEmail,
    clientName,
    accountName,
    clientAddress,
    clientPostcode,
    clientCity,
    clientCountry,
    clientEmail,
    clientPhone,
    accountIban,
    accountNumber,
    accountSortCode,
    accountAddress,
    accountPostCode,
    accountCity,
    accountCountry,
    paymentReceived,
    paymentDate,
  } = invoiceData;

  const document = await PDFDocument.create();

  const [width, height] = PageSizes.A4;
  const margin = 20;
  const primaryFont = await document.embedFont(StandardFonts.Helvetica);
  const primaryFontBold = await document.embedFont(StandardFonts.HelveticaBold);
  const page = document.addPage([width, height]); // A4 size
  page.drawText(`Invoice #${invoiceId}`, {
    x: margin,
    y: height - 50,
    size: fontSize.heading,
  });

  const dateText = new Date(date).toLocaleDateString();
  const dateTextWidth = primaryFont.widthOfTextAtSize(dateText, fontSize.text);

  page.drawText(dateText, {
    x: width - margin - dateTextWidth,
    y: height - 50,
    size: fontSize.text,
  });

  page.drawText('From:', {
    x: margin,
    y: height - 100,
    size: fontSize.text,
  });

  let senderDetailsOffset = 125;
  [
    senderName,
    senderAddress,
    senderPostcode,
    senderCity,
    senderCountry,
    senderPhone,
    senderEmail,
  ].forEach((text) => {
    if (text) {
      page.drawText(text, {
        x: margin,
        y: height - senderDetailsOffset,
        size: fontSize.text,
      });
      senderDetailsOffset += 20;
    }
  });

  page.drawText('To:', {
    x: width - margin - primaryFont.widthOfTextAtSize('To:', 14),
    y: height - 100,
    size: fontSize.text,
  });

  let clientDetailsOffset = 125;
  [
    clientName,
    clientAddress,
    clientPostcode,
    clientCity,
    clientCountry,
    clientPhone,
    clientEmail,
  ].forEach((text) => {
    if (text) {
      const textWidth = primaryFont.widthOfTextAtSize(text, fontSize.text);
      page.drawText(text, {
        x: width - margin - textWidth,
        y: height - clientDetailsOffset,
        size: fontSize.text,
      });
      clientDetailsOffset += 20;
    }
  });

  page.drawText('Invoice Details', {
    x: margin,
    y: height - 300,
    size: fontSize.text,
    font: primaryFontBold,
  });

  page.drawText(`${description}`, {
    x: margin,
    y: height - 330,
    size: fontSize.text,
  });

  const amountLabelText = 'Amount';
  const amountLabelTextWidth = primaryFont.widthOfTextAtSize(
    amountLabelText,
    fontSize.text
  );

  page.drawText('Amount', {
    x: width - margin - amountLabelTextWidth,
    y: height - 300,
    size: fontSize.text,
    font: primaryFontBold,
  });

  const amountText = amount;
  const amountTextWidth = primaryFont.widthOfTextAtSize(
    amountText,
    fontSize.text
  );

  page.drawText(amountText, {
    x: width - margin - amountTextWidth,
    y: height - 330,
    size: fontSize.text,
  });

  page.drawText('Method of Payment:', {
    x: margin,
    y: height - 380,
    size: fontSize.text,
    font: primaryFontBold,
  });

  page.drawText(`Name: ${accountName}`, {
    x: margin,
    y: height - 410,
    size: fontSize.text,
  });

  page.drawText(`Account Number: ${accountNumber}`, {
    x: margin,
    y: height - 430,
    size: fontSize.text,
  });

  page.drawText(`Sort Code: ${accountSortCode}`, {
    x: margin,
    y: height - 450,
    size: fontSize.text,
  });

  let offset = 0;
  if (accountIban) {
    page.drawText(`IBAN: ${accountIban}`, {
      x: margin,
      y: height - 470,
      size: fontSize.text,
    });

    offset += 20;
  }

  page.drawText('Address:', {
    x: margin,
    y: height - 470 - offset,
    size: fontSize.text,
  });

  page.drawText(accountAddress, {
    x: margin,
    y: height - 490 - offset,
    size: fontSize.text,
  });

  page.drawText(accountPostCode, {
    x: margin,
    y: height - 510 - offset,
    size: fontSize.text,
  });
  page.drawText(accountCity, {
    x: margin,
    y: height - 530 - offset,
    size: fontSize.text,
  });
  page.drawText(accountCountry, {
    x: margin,
    y: height - 550 - offset,
    size: fontSize.text,
  });

  page.drawText(
    `This invoice is due by ${new Date(dueDate).toLocaleDateString()}`,
    {
      x: margin,
      y: height - 600 - offset,
      size: fontSize.text,
    }
  );
  const thankYouText = 'Thank you for your business!';
  const thankYouTextWidth = primaryFont.widthOfTextAtSize(thankYouText, 12);
  page.drawText(thankYouText, {
    x: width / 2 - thankYouTextWidth / 2,
    y: height - 650 - offset,
    size: 12,
  });

  if (paymentReceived) {
    page.drawText(
      `Payment received on ${new Date(paymentDate).toLocaleDateString()}`,
      {
        x: margin,
        y: 20,
        size: 12,
      }
    );
  }

  const pdfBytes = await document.save();
  return {
    pdfBytes,
  };
};
We won’t be diving into how pdf-lib works, as it’s out of the scope of this series, but feel free to check its documentation and make some changes to the PDF’s layout.
The last thing we need to do is to deploy the function. Run the following command in your terminal from the root directory.
$ appwrite deploy function
When prompted, select the onInvoiceChange function for deployment.
Before we proceed further, I want to highlight here that in comparison to Firebase, Appwrite doesn’t offer an official way to run functions locally. Firebase provides the Local Emulator Suite, which can be used to run Firebase’s services such as Functions, Auth or Firestore on your own computer. Unfortunately, an Appwrite function needs to be deployed to take advantage of Appwrite’s functionality, such as scheduling or event triggers.
Download Invoice Functionality
Let’s add a new method called getInvoiceFileUrl to the invoice.api.js file that will be responsible for getting the URL of the invoice PDF file.
src/api/invoice.api.js
import { ID, Permission, Role } from "appwrite";
import { databases, databaseId, storage } from "./appwrite.api";

const invoiceCollectionId = import.meta.env
  .VITE_APPWRITE_COLLECTION_ID_INVOICES;

export const listInvoices = () => {
  return databases.listDocuments(databaseId, invoiceCollectionId);
};

export const getInvoice = documentId => {
  return databases.getDocument(databaseId, invoiceCollectionId, documentId);
};

export const createInvoice = (userId, payload) => {
  const ownerRole = Role.user(userId);
  return databases.createDocument(
    databaseId,
    invoiceCollectionId,
    ID.unique(),
    payload,
    [
      Permission.read(ownerRole),
      Permission.update(ownerRole),
      Permission.delete(ownerRole),
    ]
  );
};

export const updateInvoice = (documentId, payload) => {
  return databases.updateDocument(
    databaseId,
    invoiceCollectionId,
    documentId,
    payload
  );
};

export const deleteInvoice = documentId => {
  return databases.deleteDocument(databaseId, invoiceCollectionId, documentId);
};

const bucketId = import.meta.env.VITE_APPWRITE_BUCKET_ID;

export const getInvoiceFileUrl = fileId => {
  return storage.getFileDownload(bucketId, fileId);
};
Next, we will create a custom hook to handle the download.
src/views/invoice/hooks/useDownloadInvoice.js
import { useState } from "react";
import { getInvoiceFileUrl } from "../../../api/invoice.api";

export const useDownloadInvoice = ({ invoiceId }) => {
  const [downloadInvoiceStatus, setDownloadInvoiceStatus] = useState("IDLE");

  const onDownloadInvoice = async () => {
    try {
      if (downloadInvoiceStatus === "PENDING") {
        return;
      }
      setDownloadInvoiceStatus("PENDING");
      const fileId = `INVOICE_${invoiceId}`;
      const result = await getInvoiceFileUrl(fileId);
      const anchor = document.createElement("a");
      anchor.href = result.href;
      anchor.download = `${fileId}.pdf`;
      anchor.click();
      anchor.remove();
      setDownloadInvoiceStatus("SUCCESS");
    } catch (error) {
      console.error(error);
      setDownloadInvoiceStatus("ERROR");
    }
  };

  return {
    downloadInvoiceStatus,
    setDownloadInvoiceStatus,
    onDownloadInvoice,
  };
};
After we get the file URL, we create a temporary anchor element, assign the URL to it and start the download.
The last thing we need to do is update the Invoice component, as we need to add a download button and with the useDownloadInvoice hook.
src/views/invoice/Invoice.jsx
import { Link, useParams } from "react-router-dom";
import BankDetails from "./components/BankDetails";
import ClientDetails from "./components/ClientDetails";
import InvoiceDetails from "./components/InvoiceDetails";
import SenderDetails from "./components/SenderDetails";
import { useDeleteInvoice } from "./hooks/useDeleteInvoice";
import { useDownloadInvoice } from "./hooks/useDownloadInvoice";
import { useFetchInvoice } from "./hooks/useFetchInvoice";
import { useInvoiceForm } from "./hooks/useInvoiceForm";
import { useSubmitInvoice } from "./hooks/useSubmitInvoice";

const config = {
  create: {
    submitButtonText: "Create",
  },
  update: {
    submitButtonText: "Update",
  },
};

const Invoice = () => {
  const params = useParams();
  const { isEditMode, form, setForm, onFormChange } = useInvoiceForm();

  const { fetchInvoiceStatus, initFetchInvoice } = useFetchInvoice({
    id: params.id,
    onSetInvoice: setForm,
  });

  const { submitInvoiceStatus, onSubmitInvoice } = useSubmitInvoice({
    form,
    isEditMode,
  });

  const { deleteInvoiceStatus, initDeletePrompt } = useDeleteInvoice({
    invoiceId: form.$id,
  });

  const { downloadInvoiceStatus, onDownloadInvoice } = useDownloadInvoice({
    invoiceId: form.$id,
  });

  const { submitButtonText } = isEditMode ? config.update : config.create;

  return (
    <div className="flex items-center justify-center w-full min-h-screen bg-gradient-to-r from-pink-300 via-purple-300 to-indigo-400">
      <div className="min-h-screen px-8 pb-16 bg-white md:w-3/4 md:ml-auto md:pr-0 md:pl-16 md:pb-24">
        <div className="flex items-center justify-between mr-8">
          <h1 className="my-8 text-2xl font-semibold text-indigo-900">
            Invoice
          </h1>
          <Link
            className="text-sm transition-all duration-150 text-indigo-900/50 hover:text-indigo-900"
            to="/"
          >
            Back To Invoices
          </Link>
        </div>
        {fetchInvoiceStatus === "PENDING" ? (
          <div>Fetching invoice data...</div>
        ) : null}
        {fetchInvoiceStatus === "ERROR" ? (
          <div>
            <button
              className="px-4 py-2 bg-indigo-600 rounded-md text-indigo-50"
              onClick={() => initFetchInvoice(params.id)}
            >
              Try Again
            </button>
          </div>
        ) : null}
        {fetchInvoiceStatus === "SUCCESS" ? (
          <form
            className="flex flex-col max-w-5xl gap-8"
            onSubmit={onSubmitInvoice}
          >
            <div className="flex flex-col gap-8 md:gap-12">
              <InvoiceDetails form={form} onFormChange={onFormChange} />
              <SenderDetails form={form} onFormChange={onFormChange} />
              <ClientDetails form={form} onFormChange={onFormChange} />
              <BankDetails form={form} onFormChange={onFormChange} />
            </div>
            <div className="flex justify-between">
              <button
                type="button"
                className="min-w-[6rem] px-4 py-3 mr-4 font-semibold text-indigo-800 transition-colors duration-150 bg-indigo-200/25 rounded-md hover:bg-rose-800 hover:text-rose-100"
                onClick={initDeletePrompt}
              >
                {deleteInvoiceStatus === "PENDING" ? "Deleting..." : "Delete"}
              </button>
              <div>
                {form.$id ? (
                  <button
                    type="button"
                    className="min-w-[6rem] px-4 py-3 mr-4 font-semibold text-indigo-900 transition-colors duration-150 bg-indigo-200/50 rounded-md hover:bg-indigo-800 hover:text-indigo-100"
                    onClick={onDownloadInvoice}
                  >
                    {downloadInvoiceStatus === "PENDING"
                      ? "Downloading..."
                      : "Download Invoice"}
                  </button>
                ) : null}
                <button
                  type="submit"
                  className="min-w-[6rem] px-4 py-3 mr-8 font-semibold text-indigo-100 transition-colors duration-150 bg-indigo-600 rounded-md hover:bg-indigo-800"
                >
                  {submitInvoiceStatus === "PENDING"
                    ? "Submitting..."
                    : submitButtonText}
                </button>
              </div>
            </div>
          </form>
        ) : null}
      </div>
    </div>
  );
};

export default Invoice;
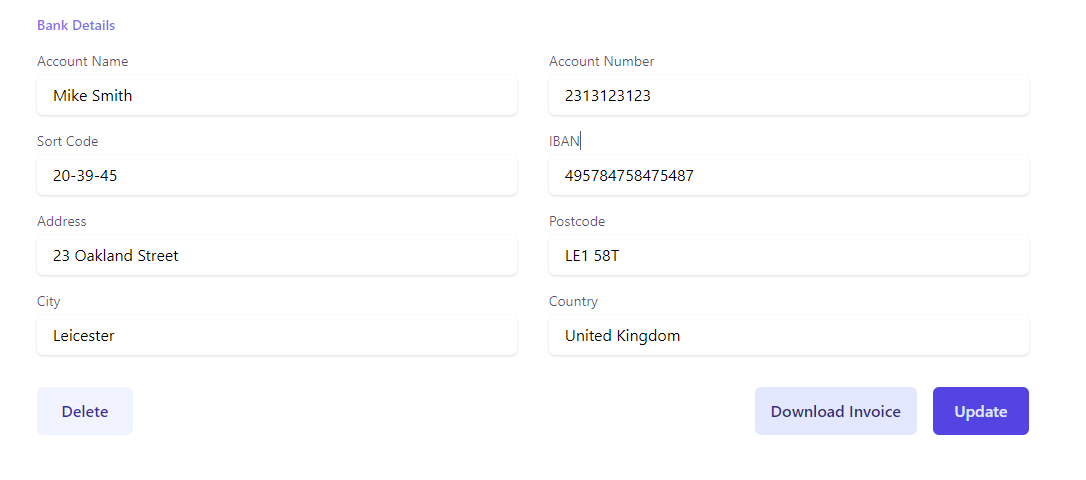
You should now be able to click on the download button to download a PDF file of the invoice.
Conclusion
That’s it for this series! It’s been quite a ride, so congratulations for getting to this point. At the time of writing, Appwrite Cloud is in beta and doesn’t offer as many features as Firebase, but it can be a good alternative if you can’t or don’t want to use Firebase.
If you are up for a challenge, there are a few things you can do to improve this application. For instance, you can try adding the following functionality:
- Add pagination to the invoices list.
- Add validation to the invoice form.
- Automatically send an email with a PDF to the client’s email.
- Modify the
createInvoicePdfhelper to handle missing data. - Modify the invoice form, so instead of having one input for description and amount, it would allow a user to add a number of separate items with amount and currency.
- Allow uploading a logo that would be displayed in the invoice.
I hope you enjoyed this series. You can find the final code for this tutorial in this GitHub repository. Happy coding!

Thomas Findlay
Thomas Findlay is a 5-star rated mentor, full-stack developer, consultant, technical writer and the author of “React - The Road To Enterprise” and “Vue - The Road To Enterprise.” He works with many different technologies such as JavaScript, Vue, React, React Native, Node.js, Python, PHP and more. Thomas has worked with developers and teams from beginner to advanced and helped them build and scale their applications and products. Check out his Codementor page, and you can also find him on Twitter.
Related Posts
Comments
All articles
Topics

Latest Stories
in Your Inbox
Subscribe to be the first to get our expert-written articles and tutorials for developers!
All fields are required